“Glazed Donut Nails” with a difference: Let’s take you into a dreamy world where we show you how to create a fairytale look with the elegant Dreamy Butterfly Nail Design. What are you waiting for?
1
For a particularly realistic result, we recommend a pointed, almond-shaped nail form for this tutorial.
2
To optimize durability, apply Base Coat N°910 to dry and clean nails.
3
Paint all your fingernails in the color “Like a virgin” N°244.30 and let the polish dry.
4
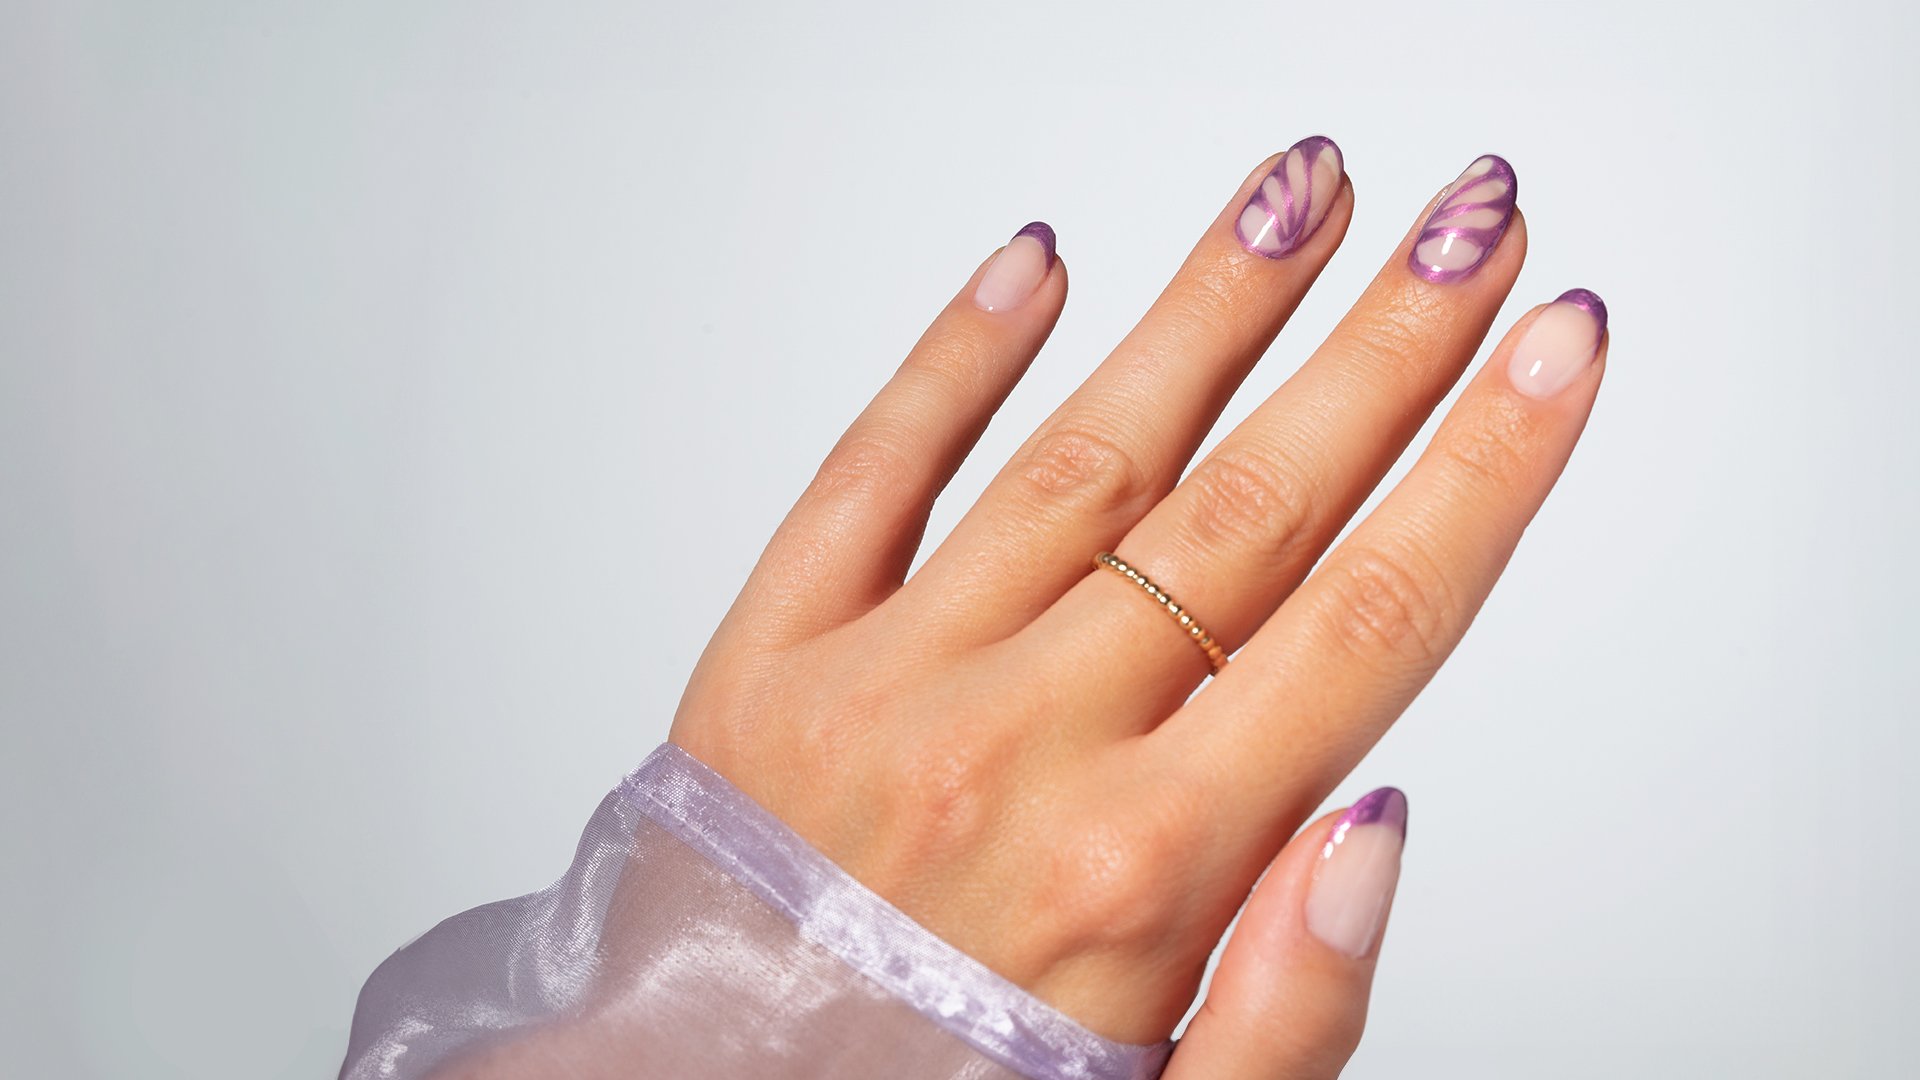
Apply the color “Bouquet of lilac” N°8.805 with a fine brush and draw the left half of a butterfly wing on your ring finger by first tracing the outline of your nail.
5
Then set a small starting point in the middle of the right nail edge. Draw four radial lines from this point to the opposite contour edge to create four drop-shaped areas of different sizes, reminiscent of a butterfly wing. Tip: Corners can be rounded off here to create a nice teardrop shape.
6
Repeat step 5 on your middle finger – but mirror-inverted – to create the right half of a butterfly wing.
7
A French tip in the color “Bouquet of lilac” N°8.805 can be drawn on the remaining nails.
8
Seal in your Nail Art with the clear “High Gloss Top Coat” N°930. Tip: For a special eye-catcher, apply individual stones to some of the intersections of the butterfly wings.